
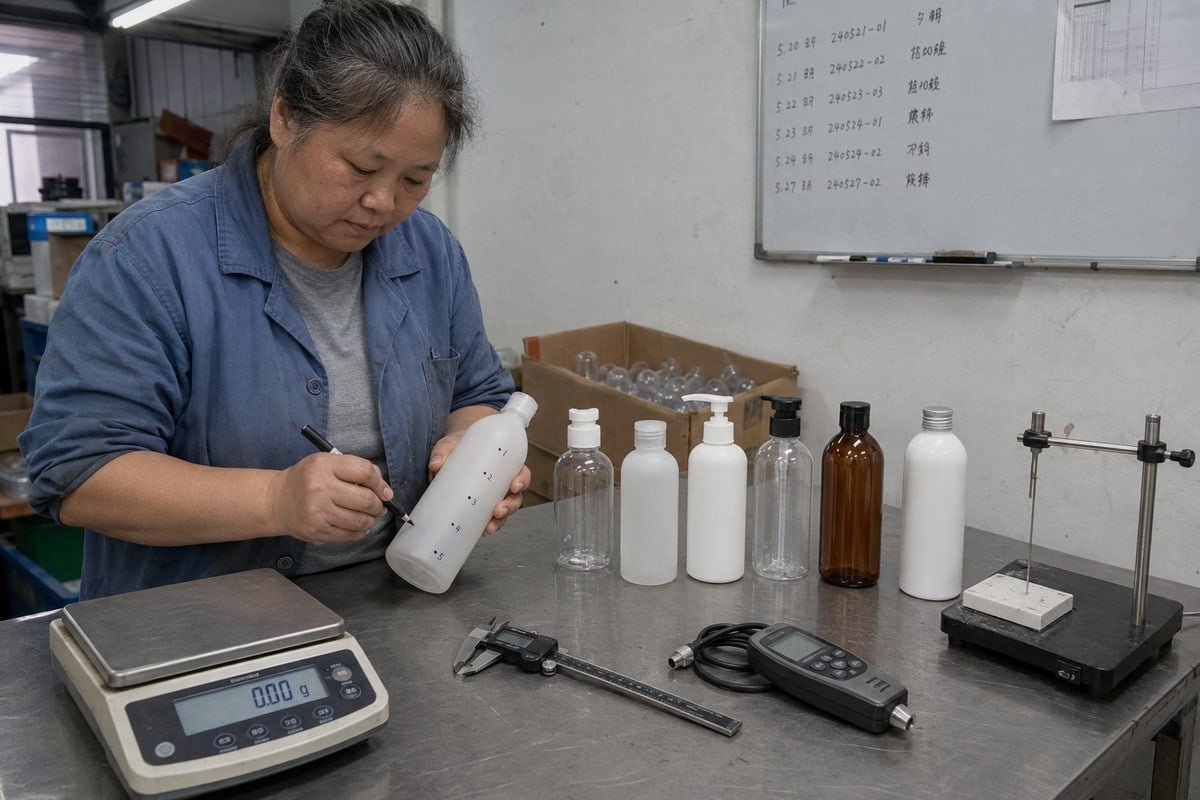
Last spring, a shipment of lotion bottles nearly failed inspection over thin shoulders. Verifying PET bottle weight and wall thickness on a budget is how our Taizhou workshop prevents that.
Verify PET bottle weight and wall thickness affordably with a 0.01 g electronic balance, digital calipers, a manual Hall effect thickness gauge, and periodic hot-wire cut-and-weigh checks. Map 5–12 fixed measurement points, sample each batch, and reserve ultrasonic or automated systems for high-volume, tight-tolerance lines.
You do not need a full lab to check bottles properly. You need the right tool for the right question. In this guide, I will walk through the tools we actually use, the benchmarks worth trusting, the pre-production checks that save rework, and the questions that keep your supplier honest on testing costs.
What Tools Can I Use to Accurately Measure PET Bottle Wall Thickness?
A German client once sent back photos of collapsed shampoo bottles. Our QC bench traced the failure to thin heels, found with a gauge that cost less than one mold repair.
Use a Hall effect thickness gauge with a magnetic target ball for non-destructive readings on the base, heel, and sidewall. Pair it with digital calipers for accessible points, a micrometer for cut sections, and take the mean of three readings at each location.
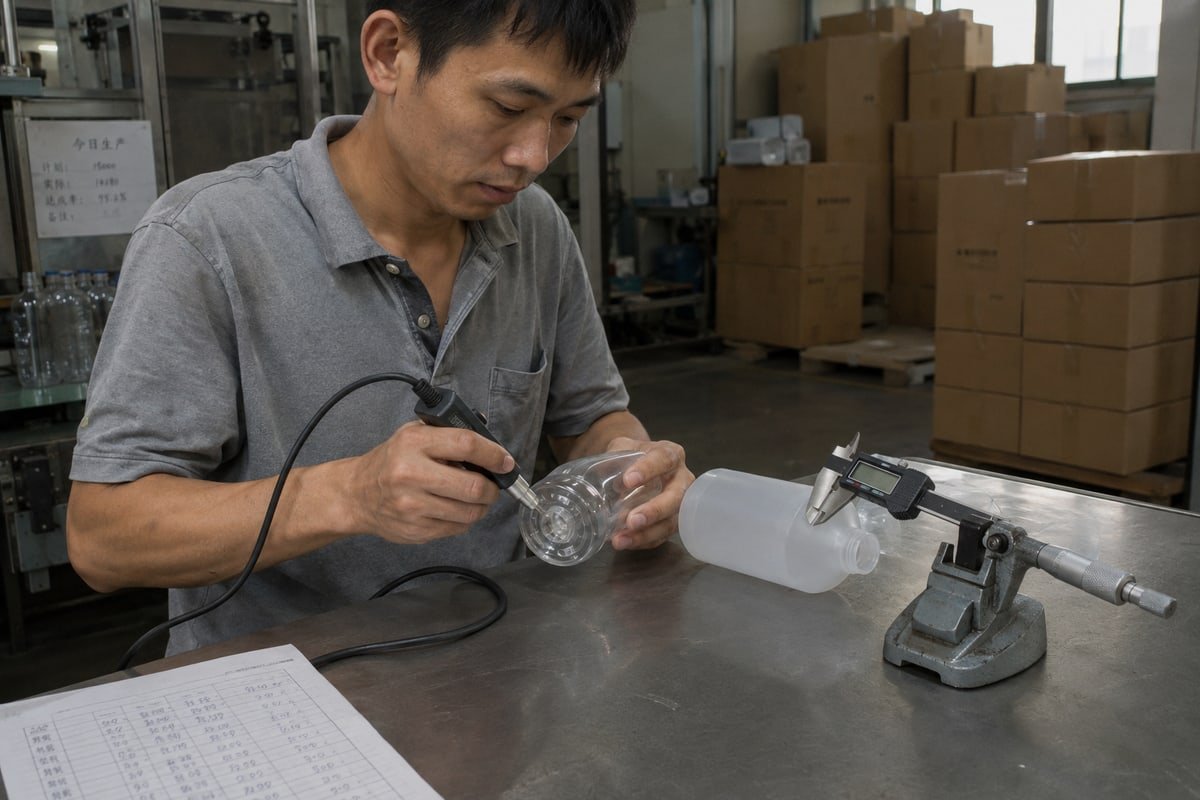
The honest answer is that no single tool wins every situation. Historically, plants measured base thickness with sectional weight comparisons or Hall effect 1 devices, and both had limits. So we group tools into three budget tiers and match each tier to the job at hand.
Three Budget Tiers That Cover Most Needs
| Tier | Tools | Best For | Rough Cost Level |
|---|---|---|---|
| Tier 1: Ultra-low cost | 0.01 g digital scale, digital calipers, visual checks | Weight confirmation, neck diameter, height | Under a few hundred dollars |
| Tier 2: Budget QC | Manual Hall effect thickness gauge, hot-wire cutter, micrometer, sampling charts | Repeatable thickness readings, sectional weight analysis | Low four figures |
| Tier 3: Higher-end | Ultrasonic gauges, inline vision systems, 3D scanning | High throughput, premium packaging, tight tolerances | Five figures and up |
Why the Hall Effect Gauge Earns Its Cost
The Hall effect thickness gauge drops a small steel ball inside the bottle. A magnetic probe outside senses the ball through the wall. This makes it ideal for curved bases and heel transitions where calipers cannot reach. It also works on the complex bottom shapes we mold for cosmetic jars and pumps.
When Destructive Testing Is the Smart Buy
A hot-wire sectional cutter splits the bottle into zones. You then weigh each section and compare it to spec. This cut-and-weigh method is destructive, but it is often the cheapest route to reliable material distribution 2 data. We run it on a few bottles per batch as a truth check against our non-destructive testing readings.
How Do I Know If My PET Bottle Weight Meets Industry Standards Without Extra Testing Costs?
Every quote we prepare balances two costs: heavier bottles that waste resin, or extra testing that inflates the unit price. Neither is necessary if you use the right benchmarks.
Compare your bottles against common industry benchmarks: preform weight within ±1% of target, wall thickness uniformity within a 5% difference, and a minimum wall of roughly 0.25 mm in one PET standard. A 0.01 g balance and a fixed sampling plan confirm compliance without paid lab testing.
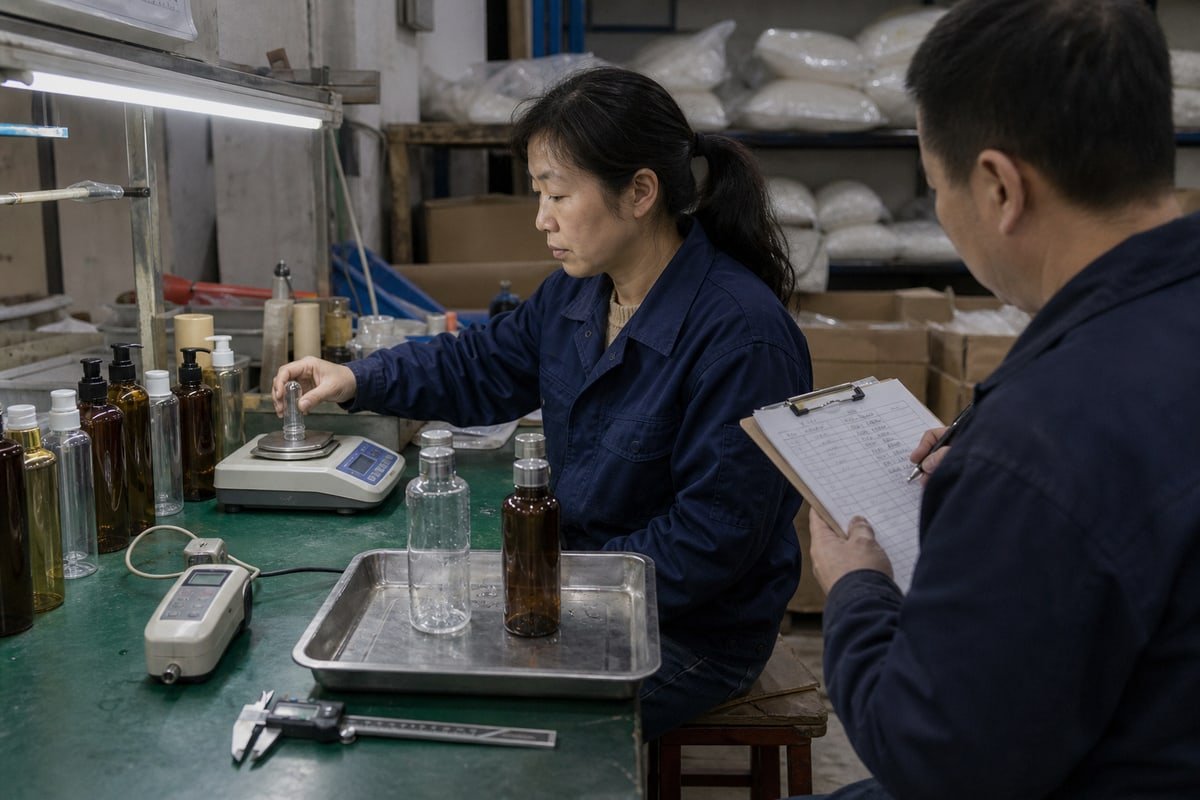
Checking PET bottle weight and wall thickness against standards starts with knowing which numbers matter. These figures are industry examples, not universal rules, because specs shift with design and application. A pump bottle for serum carries different demands than a jar for body butter. Still, the benchmarks below give you a defensible starting point.
Benchmark Numbers You Can Use Today
| Check | Common Industry Example | Tool Needed |
|---|---|---|
| Preform grammage | Within ±1% of target weight | 0.01 g electronic balance |
| Wall thickness uniformity | Within 5% difference across zones | Hall effect gauge or micrometer |
| Minimum wall thickness | 0.25 mm in one PET bottle standard | Thickness gauge |
| Readings per point | Mean of three readings | Any calibrated gauge |
Why Weight Alone Cannot Prove Quality
Here is the trap I see buyers fall into. A bottle can hit its target weight and still have a paper-thin shoulder. Stretch blow molding redistributes material during forming, so resin can pool in the base while corners starve. Weight confirms total resin usage 3. Thickness confirms where that resin went. You need both, because top load strength and burst pressure resistance depend on the thinnest zone, not the average.
Build a Free SPC Habit Instead of Buying Reports
Keep a "golden bottle" from your approved first article. Weigh five bottles per batch against it and log the results. This simple statistical process control 4 habit catches drift before it becomes a claim. It also supports lightweighting optimization later, because your own data tells you how much margin exists before performance suffers.
Can I Verify Bottle Quality Before Mass Production to Avoid Costly Rework?
An Australian procurement manager recently asked us for proof before her first full order. We ran a pilot batch and shared a 12-point thickness map within three days.
Yes. Approve a golden sample first, then run a small pilot batch and measure a fixed 12-point map across the base, lower body, mid-body, shoulder, and neck. Repeat the map after any mold or process change so defects surface before mass production, not after.
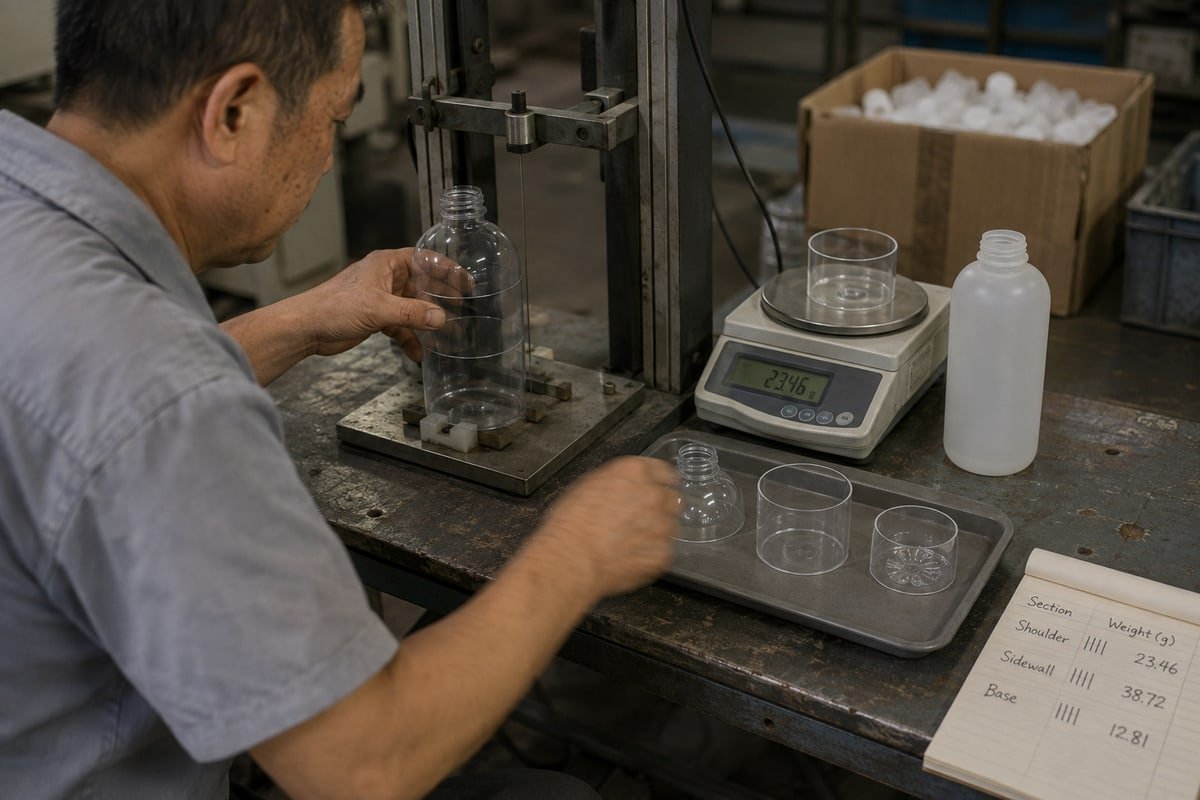
Rework after tooling is the most expensive mistake in packaging. Our team follows a staged process, and each stage answers one specific question before money moves to the next step.
- Design review with FEA. Finite Element Analysis models material distribution virtually before steel is cut. This prevents costly mold modifications and wasted resin later.
- First-article approval. We mold a short run, then weigh and map every sample. The buyer signs off on a golden bottle that becomes the reference.
- Pilot batch with a 12-point map. One guide recommends a 12-point measurement protocol for 500 ml round bottles, with extra points for complex shapes. We test the same points every time and only expand the map when a defect appears.
- Line trial after any change. New cavity, new resin lot, or a new rPET blend triggers a fresh map. Recycled flakes reheat faster than virgin resin, which can cause localized thinning unless the thermal profile is adjusted.
Match the Verification Stage to the Method
| Stage | Method | What It Catches |
|---|---|---|
| Design | FEA simulation | Bad geometry before tooling |
| First article | Full weight and thickness map | Mold balance issues |
| Pilot batch | 12-point map, cut-and-weigh spot check | Process drift, thin zones |
| Ongoing runs | Batch sampling against golden bottle | Gradual drift, rPET variation |
Some large plants now use digital twins that estimate thickness from cavity pressure and temperature data, which reduces physical sampling. That is impressive technology. But for most cosmetic packaging volumes, a disciplined pilot map delivers the same protection at a fraction of the cost.
What Should I Ask My Supplier to Prevent Overpaying for Bottle Weight and Thickness Testing?
Early in our export business, we assumed buyers knew which QC checks were free. One invoice dispute later, we learned to spell out every test in the quotation.
Ask which weight and thickness checks are included in the unit price, which instruments they use, how they sample each batch, and whether QC reports cost extra. A capable supplier includes balance checks, thickness maps, and batch records as standard, not as billable add-ons.

Overpaying usually happens for one of two reasons. Either the buyer pays for tests the supplier should run anyway, or the buyer demands automation the order volume never justifies. The fix is a short list of direct questions. Here is what we recommend our own clients ask, including us.
- Which checks are in the unit price? Preform grammage checks on a 0.01 g scale and basic caliper checks on neck diameter and height should be standard quality assurance protocols, not extras.
- What instruments do you use, and when were they calibrated? A supplier who cannot show calibration records cannot prove any reading.
- How do you sample? A fixed sampling plan per batch is enough. You should not pay for 100% inspection unless the risk truly demands it.
- How do you control the process upstream? Stretch rod timing and blow air pressure are the primary drivers of wall thickness uniformity, regardless of bottle weight. A supplier who controls these needs less inspection, which lowers your cost.
- Do you use inline sensing on high-speed lines? Infrared sensor technology can measure thickness without contact on the conveyor. This matters at beverage volumes; for typical cosmetic runs it is rarely worth a surcharge.
- How do you handle rPET batches? Ask whether the thermal profile changes for recycled content, since reheat behavior differs from virgin resin.
- What monitoring covers the environment? Even low-cost modular IoT sensors on older machines can track ambient humidity and preform temperature, two overlooked causes of thickness fluctuation.
The pattern behind these questions is simple. Spend on control, not just inspection. A supplier with a stable process, a golden bottle archive, and honest batch records protects you more than any premium testing invoice ever will.
Conclusion
Simple tools, fixed measurement points, and disciplined sampling verify PET bottle weight and wall thickness. Spend on process control, not gadgets, and pick suppliers who prove quality first.
Footnotes
1. NIST is an authoritative government source for physical measurement standards and scientific principles. ↩︎
2. Wikipedia provides a technical overview of the blow molding process used in PET manufacturing. ↩︎
3. ISO is the primary international body for manufacturing and packaging quality standards. ↩︎
4. Wikipedia explains the methodology of statistical process control used to monitor production quality. ↩︎
